How Can We Help?
How to create an invoice.
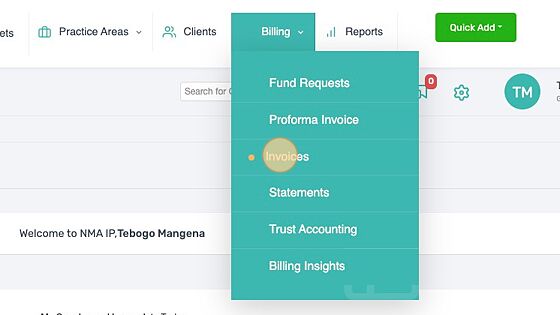
1. Navigate to the billing menu and Click “Invoices”
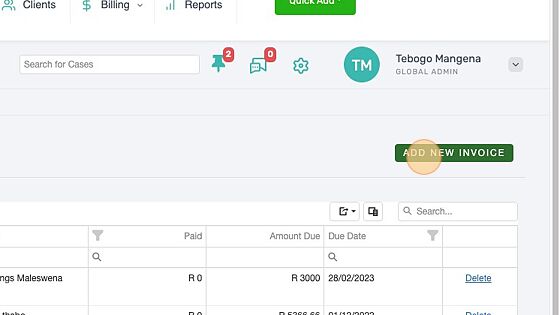
2. Click “Add New Invoice”
3. Select the client to be billed, Select the case type e.g. IP or general, Select the case related to the client to be billed.

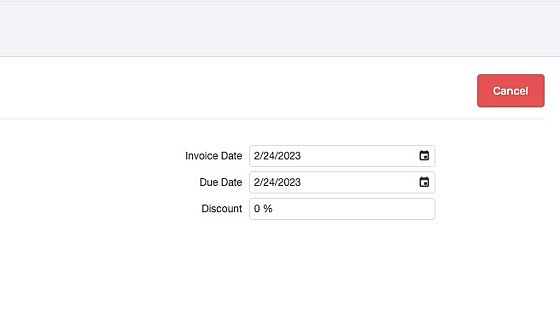
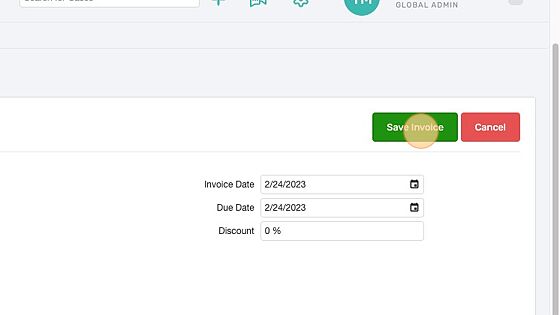
4. Select the invoice date, Select the due date, and apply a discount if applicable.
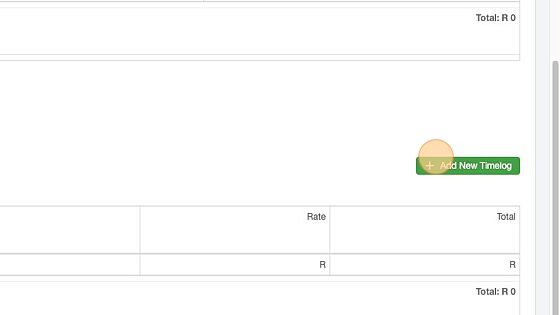
5. Click here.
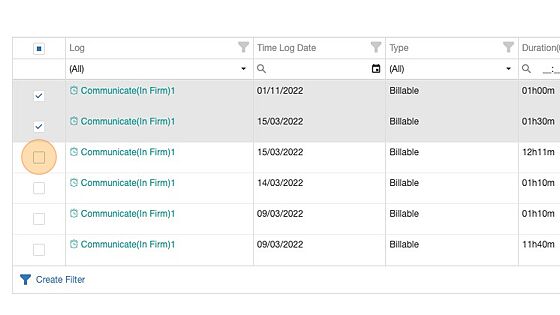
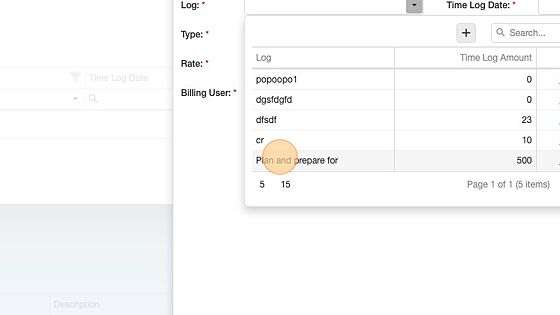
6. Select the time logs to be added to the invoice.
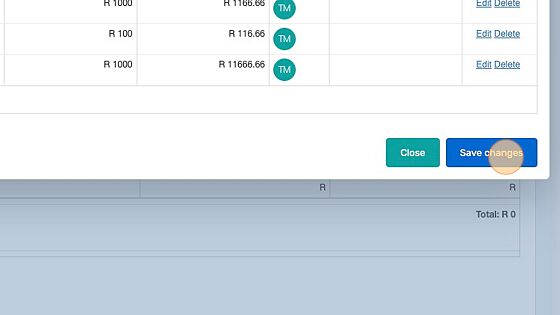
7. Click “Save changes” to save the time log items to the invoice.
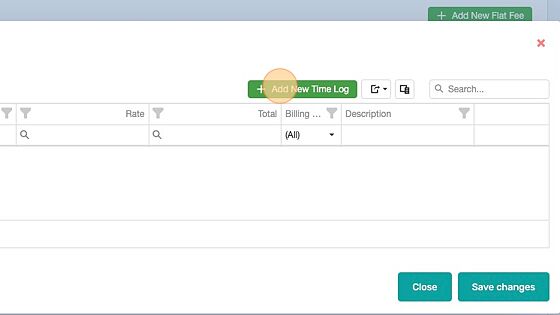
Tip! If no time log activities where selected or existed, then you can add new time logs within the invoice.
8. Click “Add New Time Log”
9. Select the time log activities and the rate will automatically be populated by the time log amount next to time time log activity.
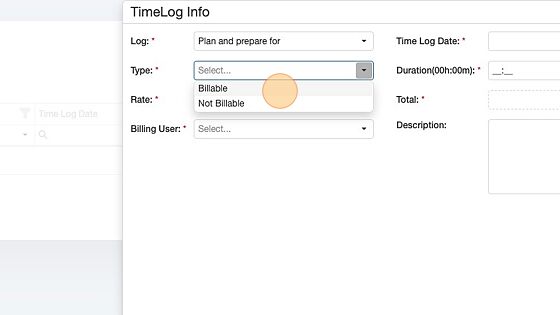
Please note! Time type – Billable the timelog will appear in the invoice. Not-billable option the invoice will not appear in the invoice.
10. Select the time log Type (Billable or not-billable)
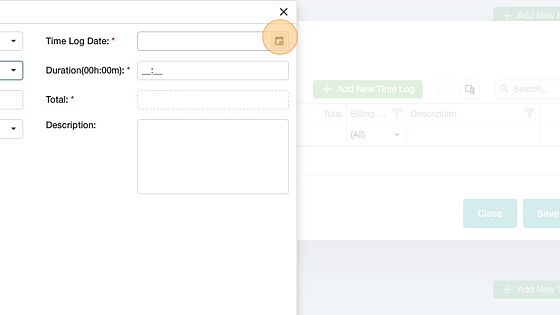
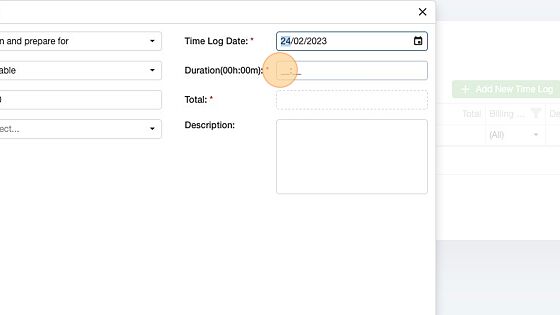
11. Choose the time log date.
12. Enter the duration of the time log, the total will be calculated automatically.
13. Select the billing user (the person who is creating the invoice)
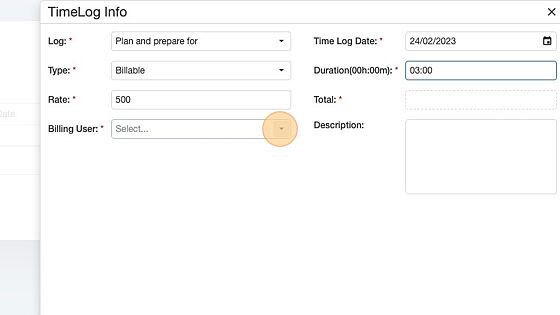
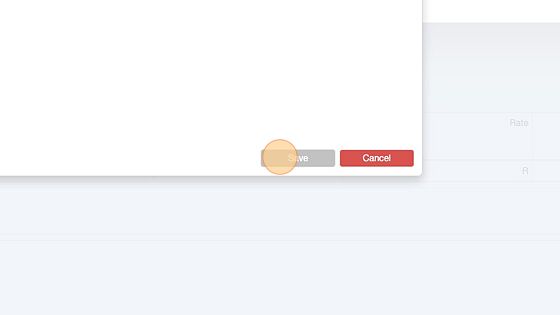
14. Click “Save” to create the time log.
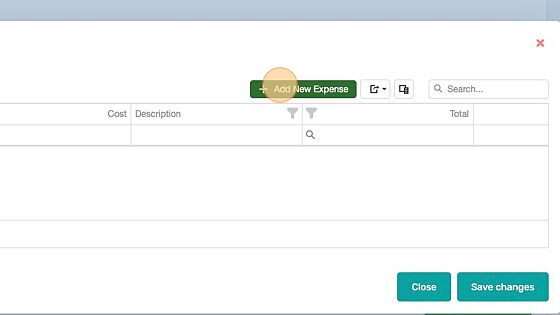
15. Click “Add New Expense”
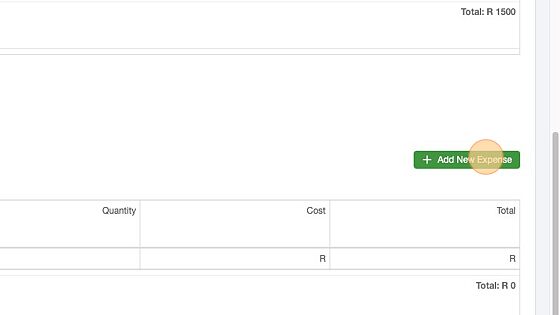
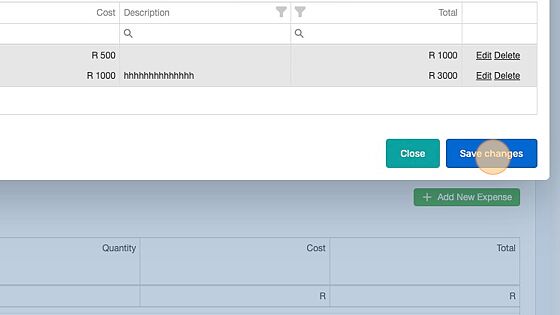
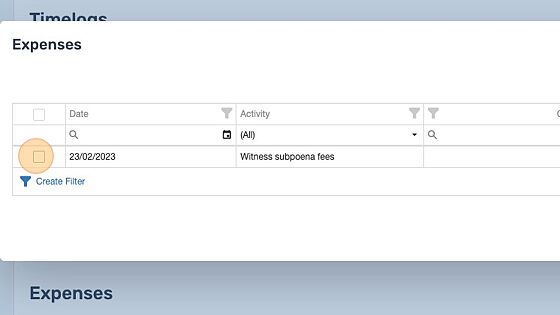
16. Select the expenses to be added to the invoice.
17. Click “Save changes”
Tip! If no expense activities where selected or existed, then you can add a new expense within the invoice.
18. Click “Add New Expense”
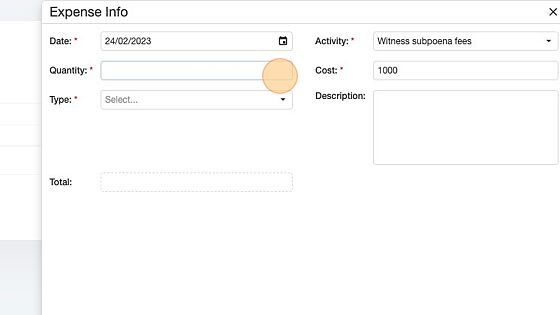
19. Select the expense date.
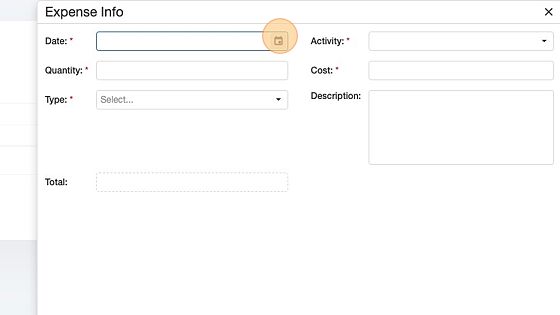
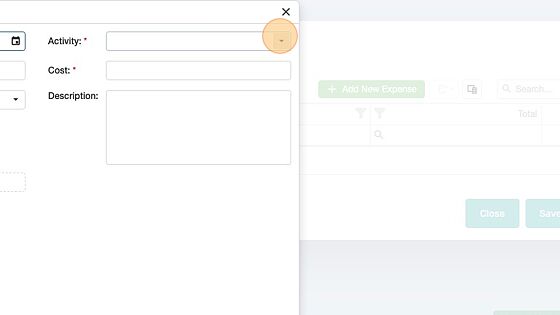
20. Select the expense activity and the cost will be automatically populated by the expense amount.
21. Enter the expense quantity.
22.
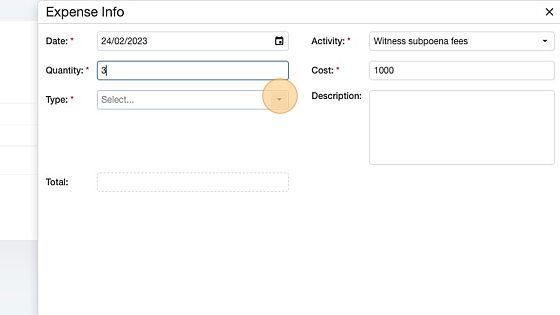
23. Click here.
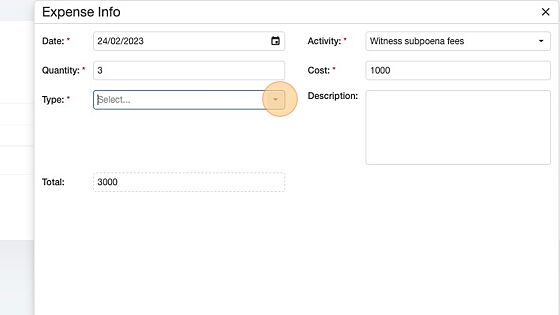
24. Select the expense type (Billable or not-billable)

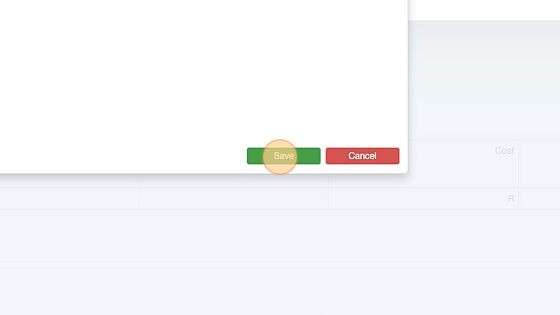
25. Click “Save”
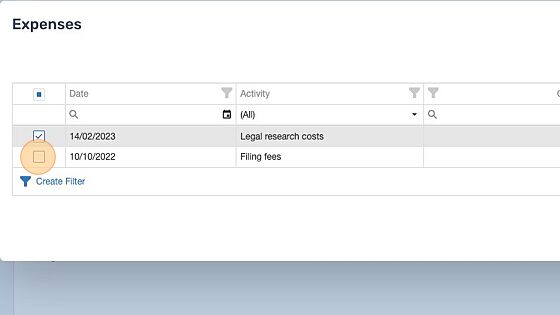
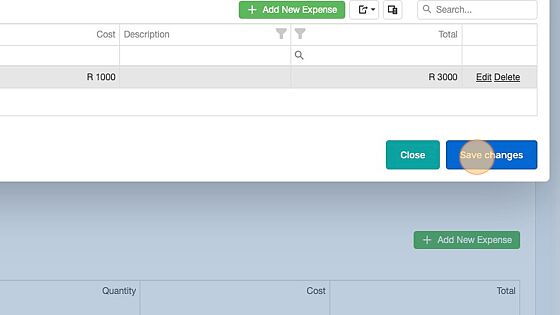
26. Select the newly created expense.
27. Click “Save changes” to add the expense to the invoice.
28. Click “Save Invoice” to create a new invoice.
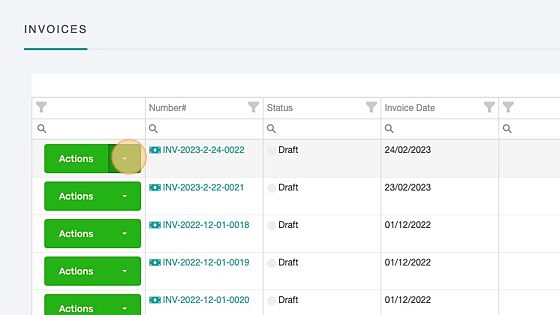
29. Click “Toggle Dropdown”
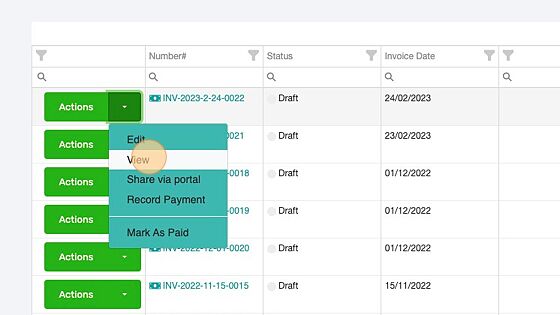
How to view an invoice
30. Select the drop down list next to the actions menu and click view. Or double click the invoice menu to view the invoice.
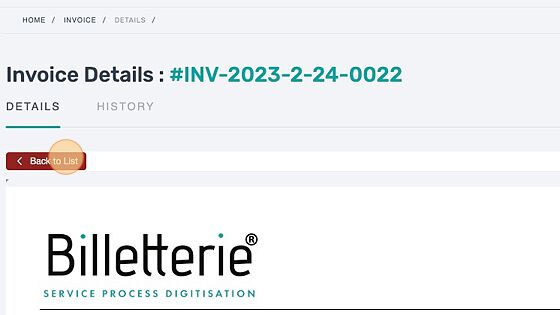
31. After viewing the invoice, click back to list to view other invoices or to apply other actions on the invoice.
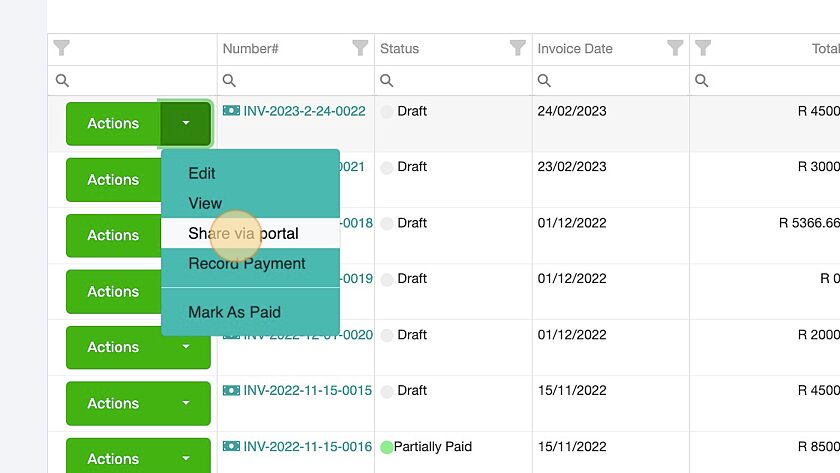
How to share an invoice via the client portal
Tip! The user sharing the invoice will receive an email after sharing. The client will also receive an email notification.
32. Click “Share via portal”, the invoice will be available on the client portal for the client to access.